Winter time is usually the best time to bake bread. It’s when your house is warm and toasty and you just feel like bread rising completes that comfortable homey feel. Well, it is summer time in Texas and hot as all heck but I really REALLY wanted some homemade bread. This recipe makes two loaves so it’s perfect for freezing one loaf and enjoying one immediately. There are endless possibilities for this fresh baked french bread. You can toast for breakfast or make french toast. For lunch, try a panini or cut into small cubes and make some croutons for your chicken caesar salad. Or it is great to toast up to accompany a fondue or top with a caprese salad to pair along with a nice bottle of wine for dinner. Have I ever mentioned I am a wine snob? I digress, that’s for another day, another time.
Baking a fresh loaf of bread is truly very simple. The only thing you need is time. I also need my kitchen aid. I love this thing! However, you can easily do by hand too.

First sprinkle the yeast over the warm water.

Next add the sugar. It helps activate the yeast. I give it a little whirl with my mixer, very little whirl on low. Then allow it to sit for a few minutes till it bubbles up.

Then I add some of the flour, salt and olive oil and whirl it until smooth.

I continue to add more and more flour until it gets to the point that it’s all wrapped around my dough hook. That tells you there is exactly the amount of flour you need. (If doing by hand, you will need to mix with a spoon until smooth, then start adding flour until it gets hard to mix and then start kneading by hand.) You now see why I use my Kitchen Aid. Living without one gave me carpal tunnel!

Once the dough forms that ball around your dough hook, pull it off the hook and hold in one hand while you spray the fairly cleaned bowl with the other. Then plop that dough right back into the bowl. (You can see the shiny spray on the inside of the bowl.) Cover with a piece of plastic wrap sprayed with cooking spray and allow that to rise for one hour in the warmest place you can find…like outside in Texas summer sun. Okay, I didn’t actually place it outside although that would have worked. I placed mine in the oven which I had heated to about 150 degrees which also happened to be the temperature outside. Just kidding!

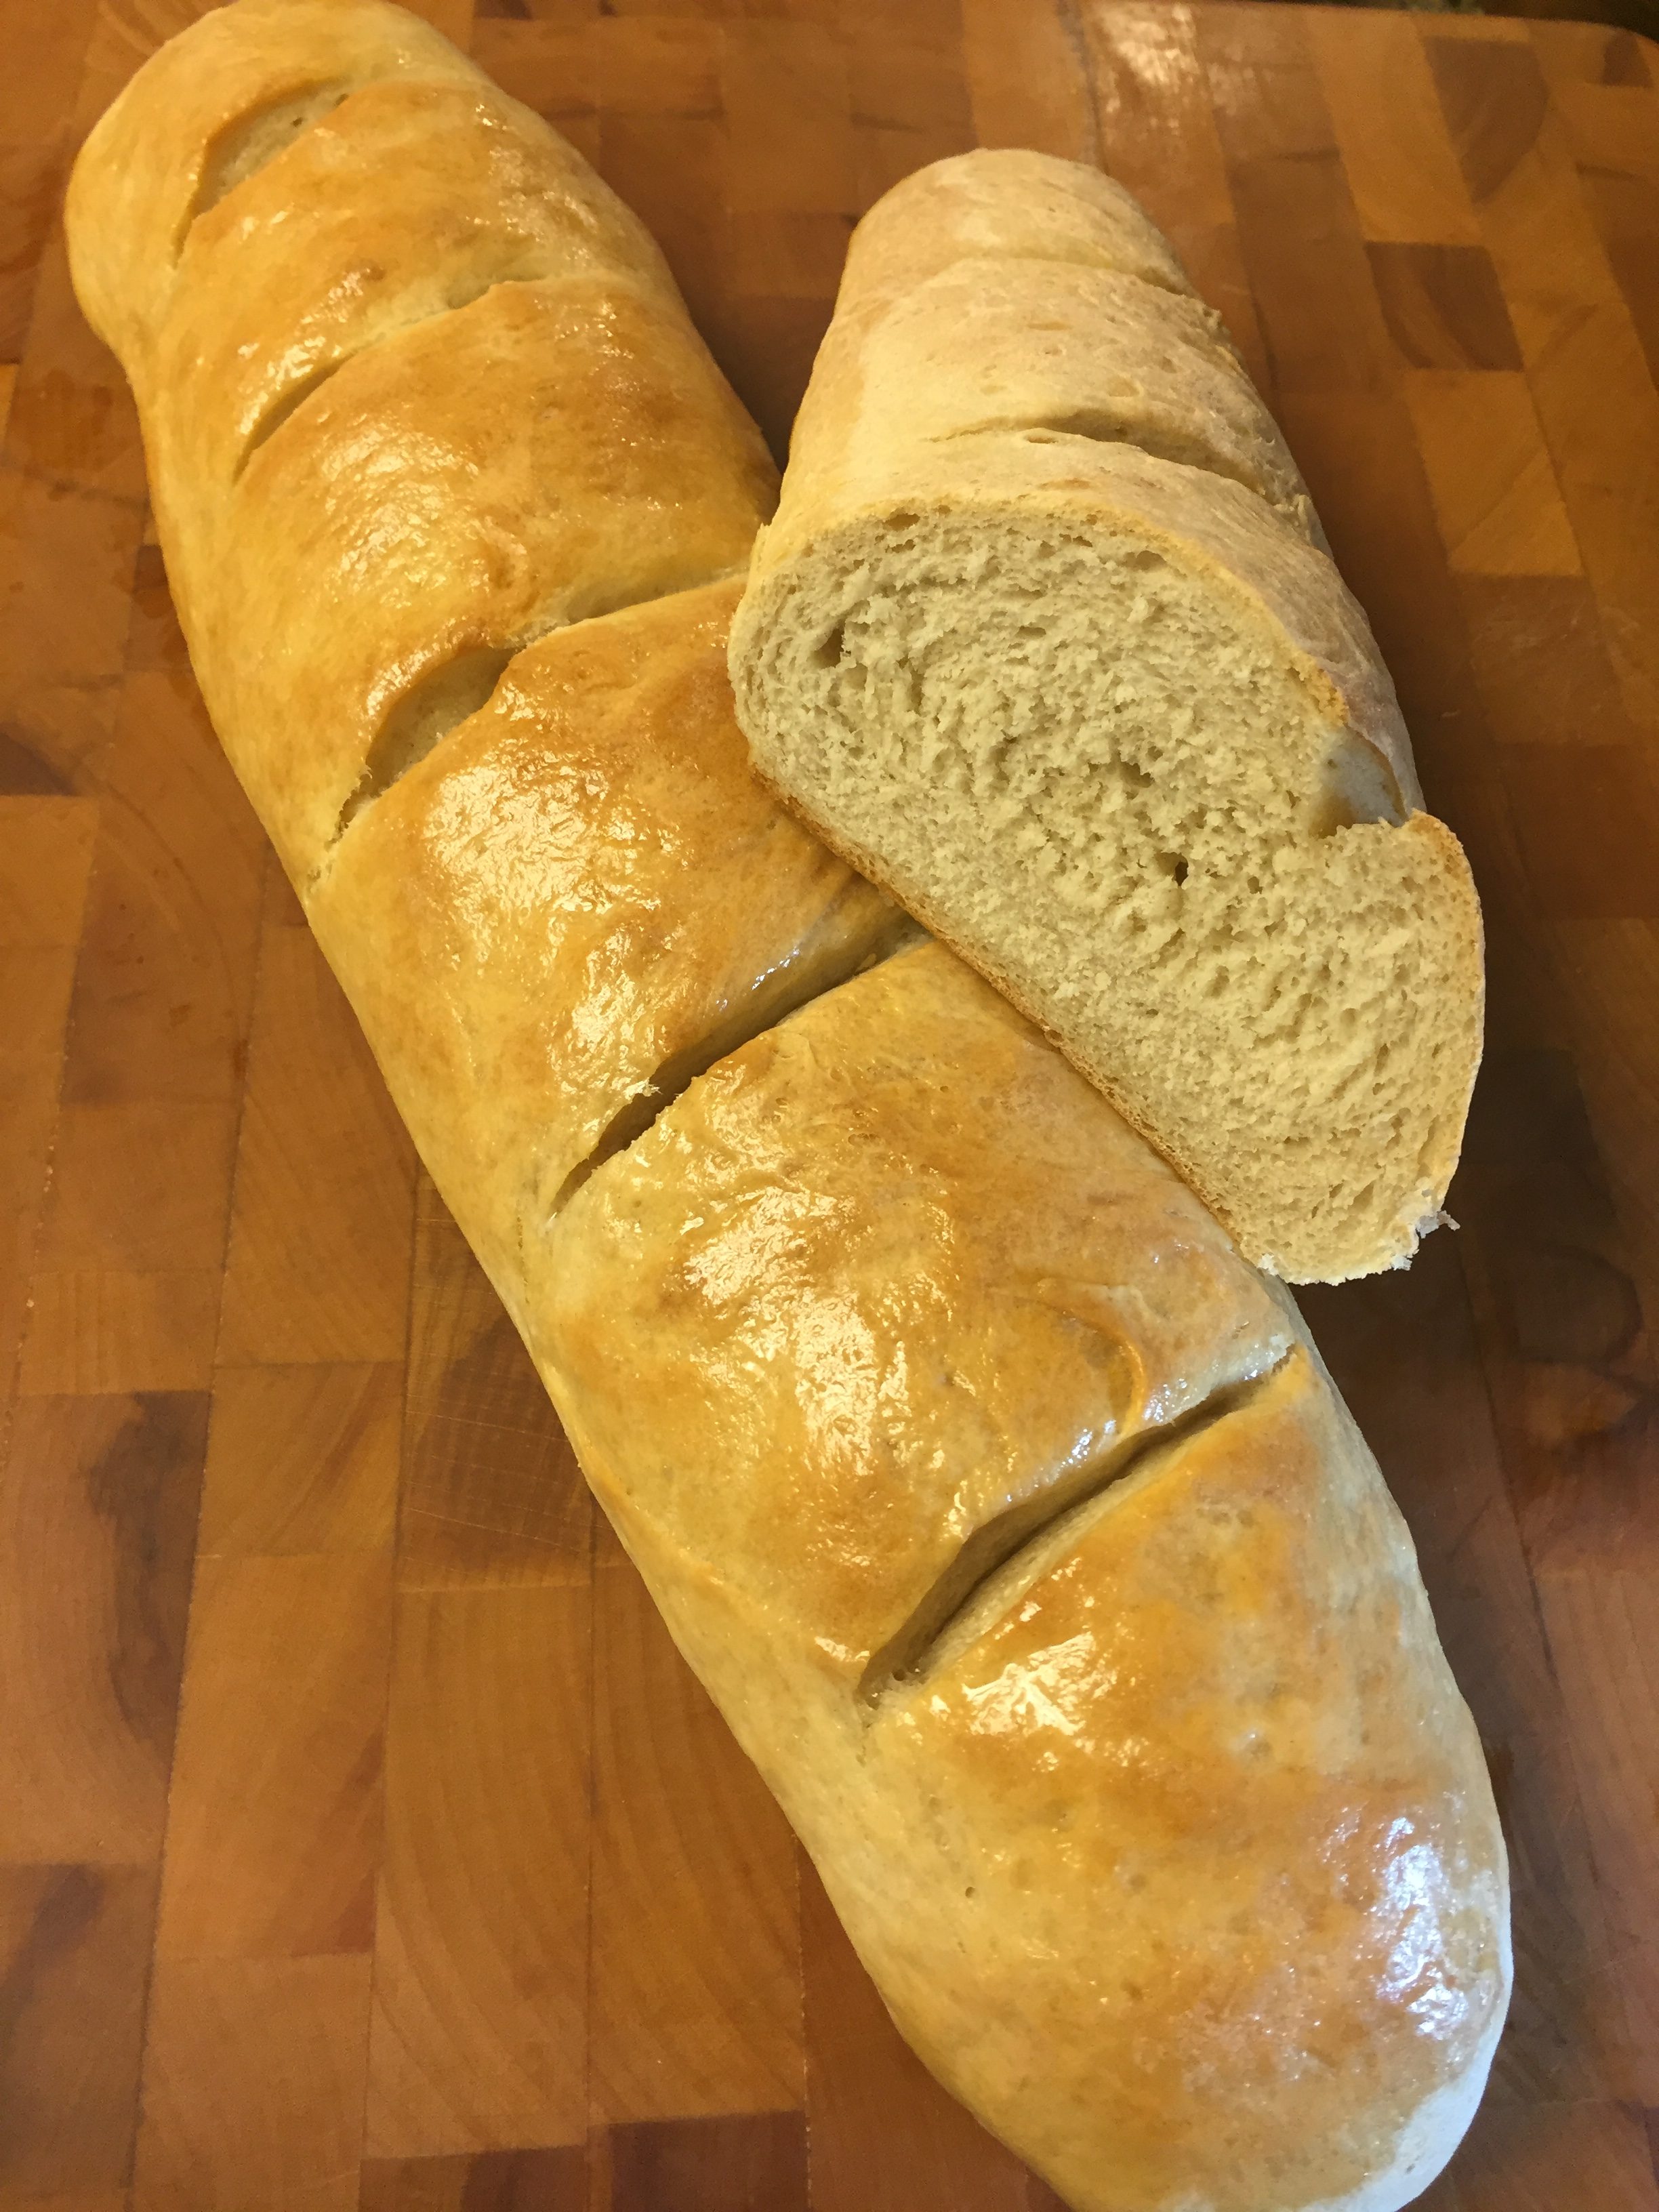
Once the hour was up, I turned the dough out on my cutting board which I sprayed with cooking spray and divided into two parts to make two loaves.

Using a rolling pin, I rolled out the dough to about a 13×9 rectangle. A very rough rectangle.

Then I rolled up the dough from the 13 inch side. Repeat process for the second loaf.

I placed the loaves on parchment lined cookie sheets that I sprayed again with some cooking spray. Cooking spray is your friend when dealing with dough. I also use two separate sheet pans to give them some room.

I covered them with plastic wrapped that I sprayed with more oil. This helps keep the dough from drying out. I might add I should have made the diagonal cuts for bread at this time, but I forgot so did it later. You can do it before or after. Allow to rise at this point again for another hour.

After the bread rises, I made my diagonal cuts with a very sharp knife sprayed with oil. Now if doing this after it rises, be aware that you must be extremely gentle since the bread is puffed up and ready to be baked. You don’t want to flop the bread at this point! That’s why I should have cut the diagonals prior to the final rise. Time to bake!

Once baked, you can spread some butter over the top of each loaf to give it a pretty shine. Or you can eat some warm bread with some softened butter which I may have done!
The wonderful smell in your house when you have been baking bread just makes life so much better. Enjoy!

French Bread
Ingredients
- 1 tbsp dry active yeast
- 2 1/4 cups warm water not hot
- 2 tbsp sugar
- 2 tbsp olive oil
- 1 tbsp salt
- 5 1/2-6 cups flour
Instructions
-
In a Kitchen Aid mixer bowl, or if by hand in a large bowl, sprinkle yeast over the warm water. Add sugar and mix slightly. Allow to sit for 3-5 minutes until yeast mixture becomes foamy/bubbly.
-
Add oil, salt and 3 cups of flour and stir with dough hook attachment and mixer on low until mostly smooth and incorporated.
-
With mixer on low speed, continue to add 1/2 cup of flour at a time until it incorporates well. The dough should form a ball around the dough hook and bowl should be fairly clean.
-
Pull dough off hook and while holding in one hand, spray the mostly cleaned bowl with the other. Otherwise set the dough on a greased surface while spraying bowl. Return dough to the greased bowl and cover with a greased (sprayed) piece of plastic wrap.
-
Allow the dough to rise about 1 hour or until doubled in size.
-
Once doubled in size, divide dough in half. Roll out on a greased surface using a rolling pin. Make into a 13×9 inch rectangle. From the 13 inch side, roll up the dough like you would a jelly roll. Place on a sprayed (greased) parchment lined sheet pan.
-
Repeat process for second half of dough. Cut diagonal marks across each loaf.
-
Cover with sprayed plastic wrap and allow to rise 1 hour. (I use separate sheet pans for each loaf.)
-
Preheat oven to 375. Once the loaves have doubled in size, bake for 25 minutes. I bake one loaf at a time but if baking both at once, be sure to carefully switch them on racks halfway through baking.